
Whether your a burlesque babe preparing for a big reveal, or a pole or lyra Siren ready to perform, pasties are one of the essential items on your Nightcap packing list! Pasties are small, lightweight and often decorative covers for your nipples. They can be covered in fabric, sequins, rhinestones, and many have tassels hanging from the points for twirling. Even if you won't be performing a striptease, pasties are super useful to ensure there are no cheeky slips from your lovely lingerie! Make your own set of pasties to match your costume, and get creative with the designs. Plus, they make a perfect handmade gift for a friend!
Tutorial and photographs by Eva Devore
You will need:
Base Material - you can use craft foam, buckram or cardboard
Quick-drying Tacky Craft Glue
Bobby Pins
Decorations - Sequin trim, fabric, rhinestones and/or tassels
Double-sided Tape or Spirit Gum

The first step is to cut out the basic shape of your pastie! To get the right size, measure across your areola with a tape measure. Then, find something round (like a cup or jar) to trace around. Here we are using craft foam, but you can use cardboard, or buckram, which is a hat-making material.
Mark the centre of the circle, and cut a slit to that point. This will help us create the cone shape of the pastie.

Put a thin layer of glue onto one edge of the slit in your pastie base, creating a triangular wedge shape, like in the picture above. Fold the other edge of the slit on top to create a cone shape. You can make it as pointy or as shallow as you like!
Use bobby pins to hold the edges of the pastie together while the glue dries, to make sure it's nice and secure. Refer to the drying time on your craft glue.

Once the glue on your pasties has dried, you can start to decorate them! A simple way to add sparkle to your pasties is to use sequin trim, which you can buy from most craft and hobby stores for about $4 per metre.
Start on the outside and add a thin line of glue to the edge. Place your sequin trim along the edge of the pastie, pressing lightly. Add more glue, and spiral the trim in to the centre of the pastie, making sure you don't leave any gaps between the sequins.

Another method to decorate your pasties is to use crystals! Crystal rhinestones are very sparkly and twinkle under the stage lights. Cover your pastie base in a matching scrap of fabric, sticking it down with glue. Then using a special rhinestone glue, place your crystals all over your pasties.
We sell packets of 300 crystal rhinestones in a range of colours here at Sky Sirens! You can also purchase Gem-Tac, a special rhinestone glue, here in the studio. If you'd like to know more, Speak to a Siren!
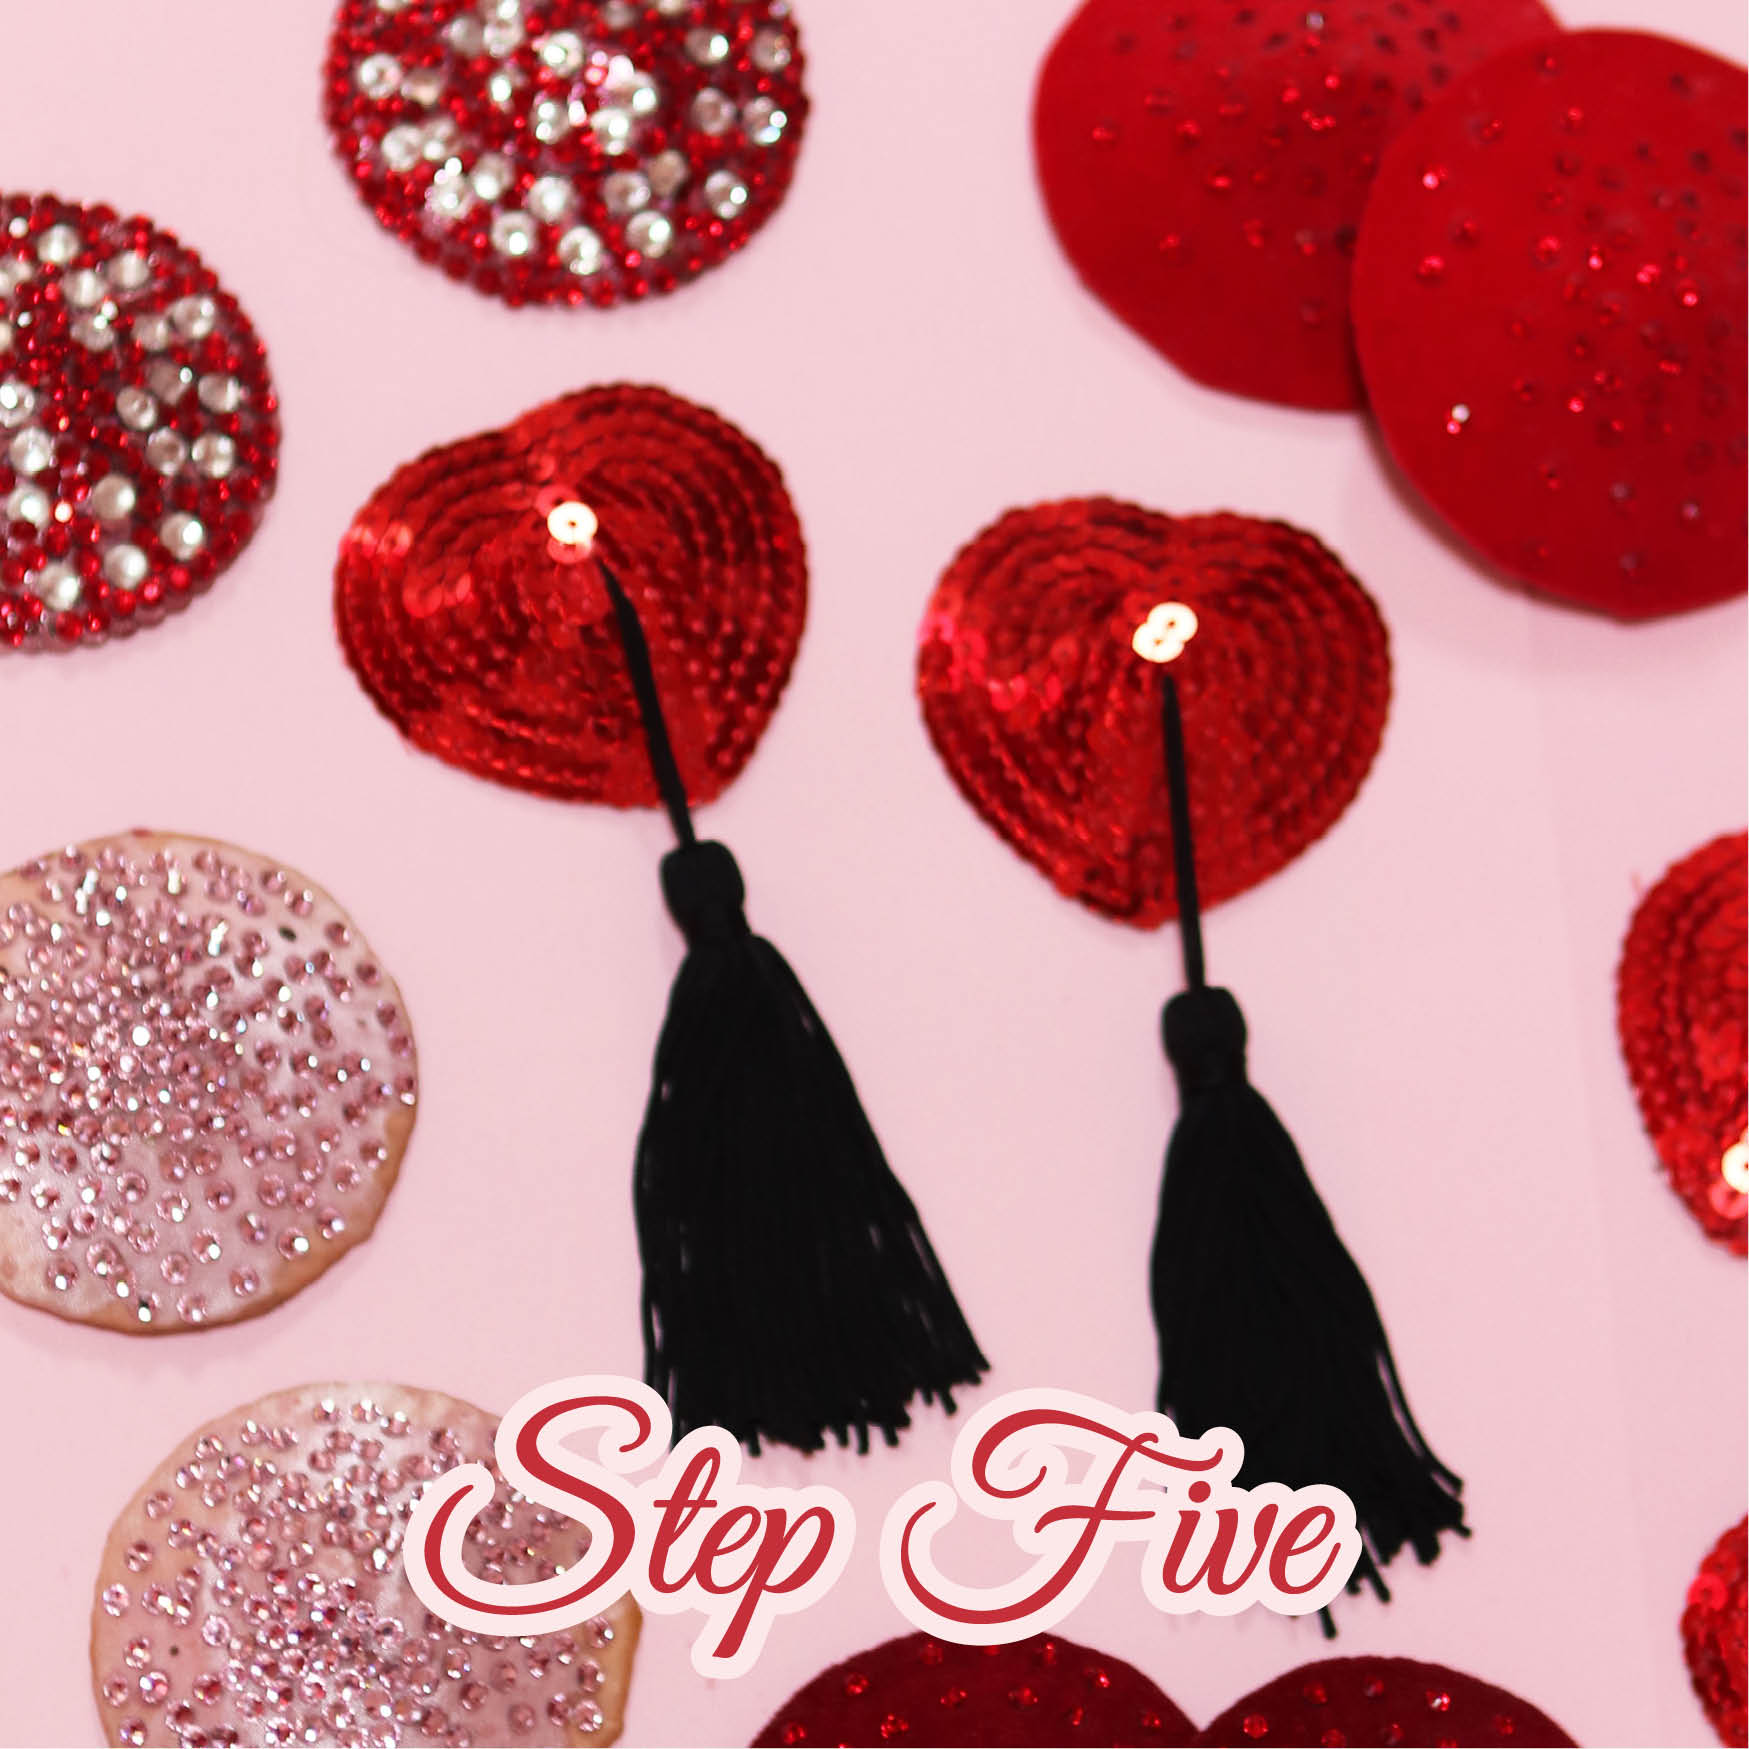
Tassel twirling is one of the main things that people associate with pasties! To add some tassels to your pasties, poke a small hole in the point of the pastie, and thread your tassel through. Tie a knot on the other side so that the tassel doesn't fall out. You can add a dot of glue to the knot for extra security.
Get creative with your tassels! You could decorate the tassel knot with crystals, or use strands of beads instead for a sparkly style. Just remember not to make them too heavy, or they won't stay on!

Once your pasties are finished, there are a couple of methods you can use to put them on!
Spirit Gum is an adhesive that is used for prosthetic make-up, so its safe to use on your skin. Spread a thin layer on to the pastie, allow it to dry, and then press the pastie to your nipple.
You can also use double sided body tape. Stick a piece of tape to the back of the pastie, peel off the backing and stick it to your nipple.